Description
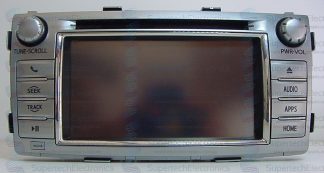
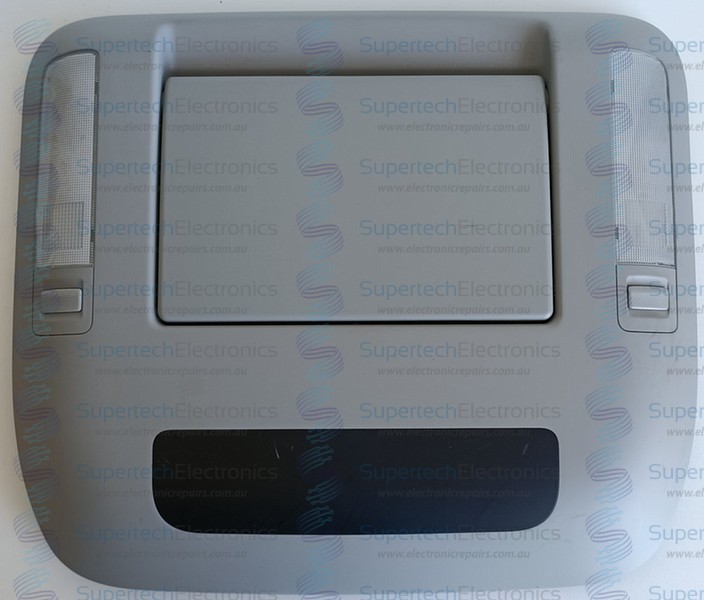
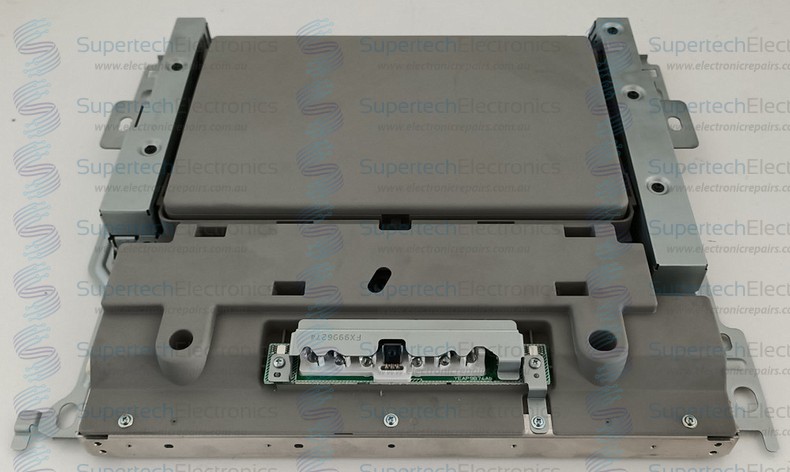
Do you have the dreaded “No Audio” fault in your Toyota Prado Kakadu / Landcruiser 200 Series Sahara? If you have the roof-mounted monitor fitted this is most likely the cause of no sound in your car! We can repair your monitor and get the sound back working again! Believe it or not, even if you don’t use it, it must be working in order to have sound working! It is strange but it is what is required to get sound working again. Worry not! We have repaired a lot of these units and solved countless cars “No Audio” fault for a fraction of what a replacement unit costs!
If you’re not sure what is going on scroll down to the “How to open the Diagnosis menu” where we show you how to test the system in your own car!
Common Faults/Issues
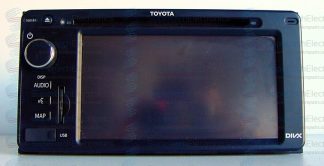
Display Damaged Or Cracked
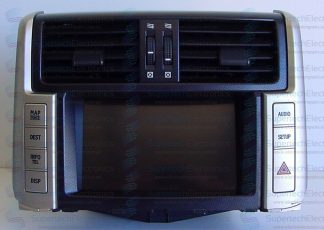
“No Audio” from the front display. The diagnosis menu shows RSE as “NCON” or “NRES” preventing sound from working
Models Repaired
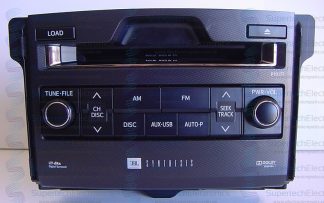
Panasonic
BLUE PLUG TYPE
8668060030A0
86680-60030-A0
CVRT4972AJ
CV-RT4972AJ
8668060030B0
86680-60030-B0
CVRT4973AJ
CV-RT4973AJ
8668060120B0
86680-60120-B0
CVRT4963AJ
CV-RT4963AJ
8668060120E0
86680-60120-E0
CVRT4962AJ
CV-RT4962AJ
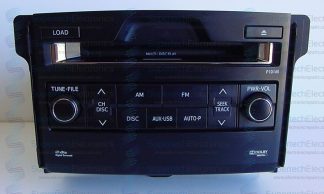
BROWN PLUG TYPE
8668060190B0
86680-60190-B0
CVRT41G1AJ
CV-RT41G1AJ
8668060190A0
86680-60190-A0
CVRT41G0AJ
CV-RT41G0AJ
How to Remove – Video Instructions
How to open the Diagnosis menu
If you have a Toyota Prado Kakadu, or even a Landcruiser Sahara from around the ages of 2008-2012 and have lost audio, the video below might help you figure out what is going on in order to repair it back to working order. There is a diagnosis menu built into the screen which can point you in the direction of the fault. These audio systems are a highly complex system that requires all modules fitted to the car to be present and functional. If any of the modules stop working or are removed you will lose sound.
To access the menu
1) Have the radio on and display up
2) Press and HOLD the “Info” button while turning the headlights on-off 3 times
3) Press “Failure Diagnosis” then “System Check”
4) If “MOST” is orange, press it, this will then tell you the fault
5) To exit, press and hold “DISP” or simply turn the car off and on again
EMV = Display
Audio = CD Stacker below the display
AMP = Amplifier under your sear
RSE = Rear Seat Entertainment (Roof-mounted monitor)
DTE = Digital TV Tuner
Yours may have other devices on the display. The unit you will be concerned about is any unit that is:
NCON = Not Connected
NRES = Not Responding
If you are unsure what is on the screen, you are welcome to take a photo of the menu and email through to us or give us a call and we can assist
If your roof monitor is the Brown Plug type
We have found in some cases that the wiring loom in the car can be the fault of having no sound. One of the tell tails is that the diagnosis menu will have every module come up “OK” But you still have no sound. A quick test that sometimes works is to unplug the MOST cable from any of the modules and plug it back in. You may get sound back for a second before it cuts out. In this case you will need to attend to the wiring loom in the car.